Mechatronics Robot

Intro
This years ME210 challenge was to build an autonomous robot that could navigate around an arena and fire small yellow balls at an opponents towers. The team who destroyed (knocked down) more of the towers at the end of a 2 minute 10 second round was the victor. Our robot, “Game of Loans” (the competition was Game of Thrones themed) came in 2nd place out of 32 teams competing. Below you’ll find the video of the final round. Each team destroyed all 4 of the stationary towers with our team barely missing the moving “dragon” target. Because the other team (far side of the arena) destroyed their first tower before we destroyed our first tower, they are awarded the win.

Above you can see our team’s strategy. At the beginning of the round, you are in the Throne Room. From there, our robot navigates to the Royal Armory in order to load ammunition. To get from the Throne Room to the Armory, we use our ultrasonic distance sensors combined with closed loop PID control to sense the area walls and move towards the Armory. After loading for a set duration of time, our robot reverses out of the Armory, and takes aim at the first target, Winterfell.
This target is made out of plastic kids bricks and is very slim, making it difficult to hit. We fire three balls at this target, before re-angling the robot using our trigonometric position from the walls (via ultrasonic sensors) to fire at Casterly Rock. After firing our last three balls at Casterly Rock, we return to the Royal Armory to reload.
After reloading, we drive across the arena, past Kings Landing in the middle and take position to fire at the last two static targets, Kings Landing and Dragonstone. Again, we use the ultrasonic sensors to determine our angle relative to the walls which allows us to accurately shoot the targets across the arena. After taking down King’s Landing and Dragonstone each with three balls, we return to the Armory to reload and repeat the targeting process in case we missed any of the targets on the first time through.
Propulsion System

Competition specifications dictated we use two 3000 mAh 7.2v batteries. We were free to chose any propulsion system we wanted. Our team chose to use two non-encoded 12V DC motors to power our robot. The wheels (2 7/8” BaneBot Wheels) were mounted at the midpoint of our robot allowing the turning radius to be small. 3D printed casters where mounted on the front and back to keep the robot level. The motors and wheels were mounted to the base plate using a custom 3D printed mounting solution which included mounting points for the motors, wheel bearings shaft locks.


In order to get a better picture of the performance of our motors, we plot the motor characteristics of our drive motors. Based on our calculations we are able to determine the power draw for one round of the competition.
Ball Release Mechanism
An important design feature of this competition was the ability to dispense the appropriate amount of balls at the right time. We were allowed to hold up to 6 balls on our robot at a time. However, it does not always make sense to fire 6 balls at a time at one target. Our final robot design shot 3 balls at each target allowing us to take down two targets each time we reload.
The ball release mechanism uses a single microservo that rotates ~180º allowing only one ball to be dispensed into the ball launcher at a time. The next ball naturally falls into the cup via gravity. When ready to shoot, the cup rotates and drop the ball, before preparing the next ball.

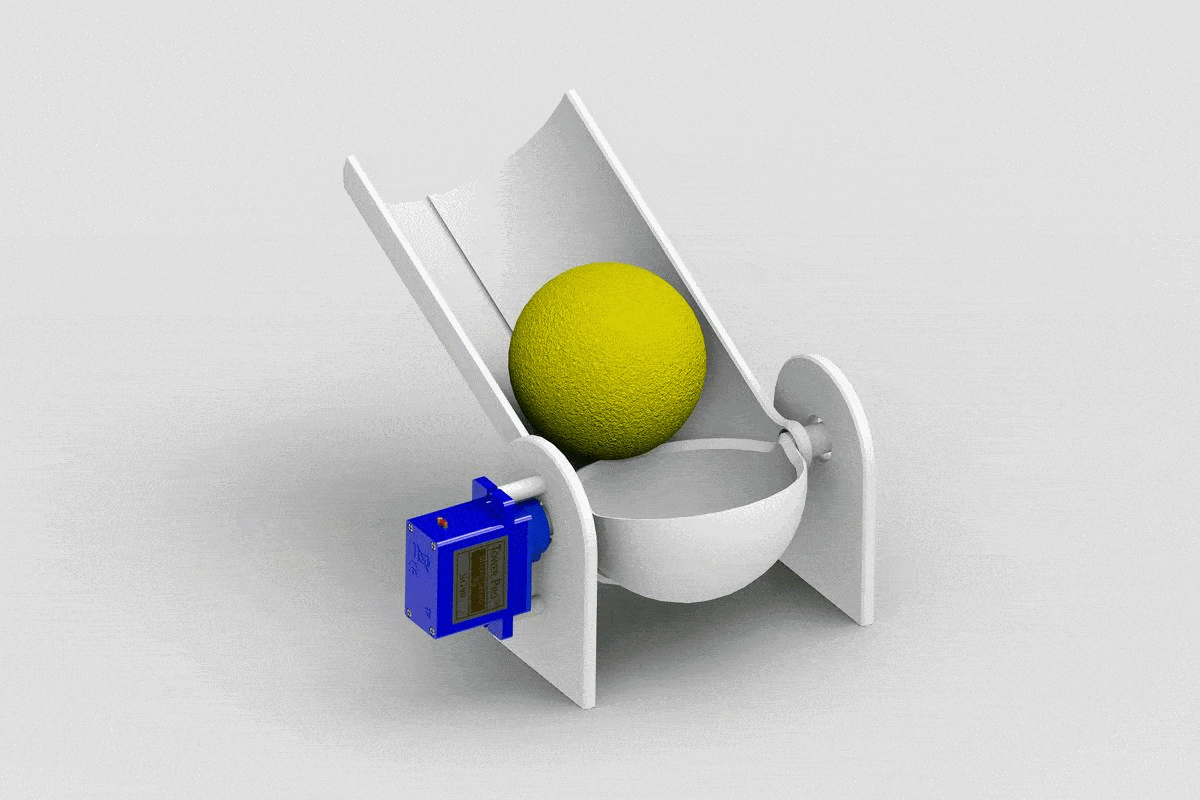
Ball Launcher
The ball launcher is a fully 3D printed mechanism that is designed to fire ~44[mm] diameter foam balls at high velocity. Inside the launcher are two weighted flywheels which are powered by the DC motors that you see on the top of the launcher. A ball is dropped into the launcher, squeezed and accelerated by the flywheel and launched out of the front of the barrel.
Software
The code for the robot can be downloaded on GitHub at the following link: https://github.com/vitasfansNo1/ME210RobotCode
Below is the finite state diagram for our robot. The robot initialized in the blind forward state, in which it moves straight forward for a set amount of time. It then aligned itself to be parallel to the West wall, and then moved forward using a proportional-integral controller to align itself an offset distance from the wall while moving toward the loading zone (armory). It then would cycle through the states of Pushing Button through Firing until the game timer expired.
In the Align state, the robot would align the two ultrasonic sensors on the left hand side to be the same distance from the wall, thus turning the robot straight towards the armory. In the PID Forward state, we used a proportional-integral controller with Kp = 0.08 to align the two ultrasonic sensors on the left hand side a steady state distance of 7.5 cm away from the wall while moving towards the armory.
A major component of our navigation (and PID control) was the ability to use the left sensors to determine the normal offset distance and angle of our robot with respect to the wall.


In the Pushing Button state, the robot moves straight to the armory until it senses the wall in front of it, and waits on a delay to be loaded in the Loading state. The robot then moves back, using the proportional-integral controller to stay aligned with the wall, until it reaches a set distance from the back wall as measured by the ultrasonic sensor. In each Moving Back state, the robot turns to a certain angle to aim at each tower using another proportional-integral controller to precisely measure the angle the two ultrasonics sensors on the left hand side measure from the wall. In Moving Back 1 the robot moves to the first position to aim at the towers at the East side of the arena, and in Staging 2 it moves to a position further South of the Armory to aim at the further towers. Within each Moving Back state, the robot aimed at each of the two towers on that side of the field and fires three times. When it fires all the ammo, it returns to the Pushing Button State.
Additional Competition Videos
Quarter Finals Round Video
Our robot performed flawlessly hitting all four towers on its first try!
Semi Finals Round Video
Our opponent’s strategy was to wait in the front left corner until it senses the dragon pass in front of their IR sensor.

Left to Right: Aubrey Kingston, Nate Simon, James Wang, Natalie Ferrante